How to Install a Wallpaper
Installing wallpaper is easier than many homeowners expect, especially when using premium non-woven wallpaper. With a properly prepared wall, the correct wallpaper adhesive and careful alignment of the first strip, you can achieve a smooth, professional-looking finish that lasts for years.
What You'll Need
Before you begin, gather the following tools and materials:
- Wallpaper
- Non-woven wallpaper adhesive
- Paint roller and tray
- Paintbrush
- Bucket
- Spirit level or plumb line
- Pencil
- Tape measure
- Wallpaper smoothing tool or wallpaper brush
- Wallpaper seam roller (if recommended)
- Steel ruler or trimming guide
- Sharp snap-off knife
- Clean damp sponge or cellulose sponge
- Step ladder (if required)
Before You Start
Preparing the wall properly is one of the most important steps for a successful wallpaper installation.
Make sure the wall is:
- Clean
- Dry
- Smooth
- Free from dust and grease
- Free from loose paint or old wallpaper
Fill any holes or cracks, sand rough areas and apply a wallpaper primer if the wall is highly absorbent, newly plastered or significantly darker than your new wallpaper.
A well-prepared wall helps wallpaper adhere evenly and creates a better overall finish.
Preparing the Wallpaper Adhesive
Use a wallpaper adhesive that is recommended for non-woven wallpaper.
Follow the manufacturer's mixing instructions carefully if using powdered adhesive, or stir ready-mixed adhesive thoroughly before use.
Preparing the adhesive correctly helps ensure strong, even bonding.
Step-by-Step Guide
1. Check Your Wallpaper
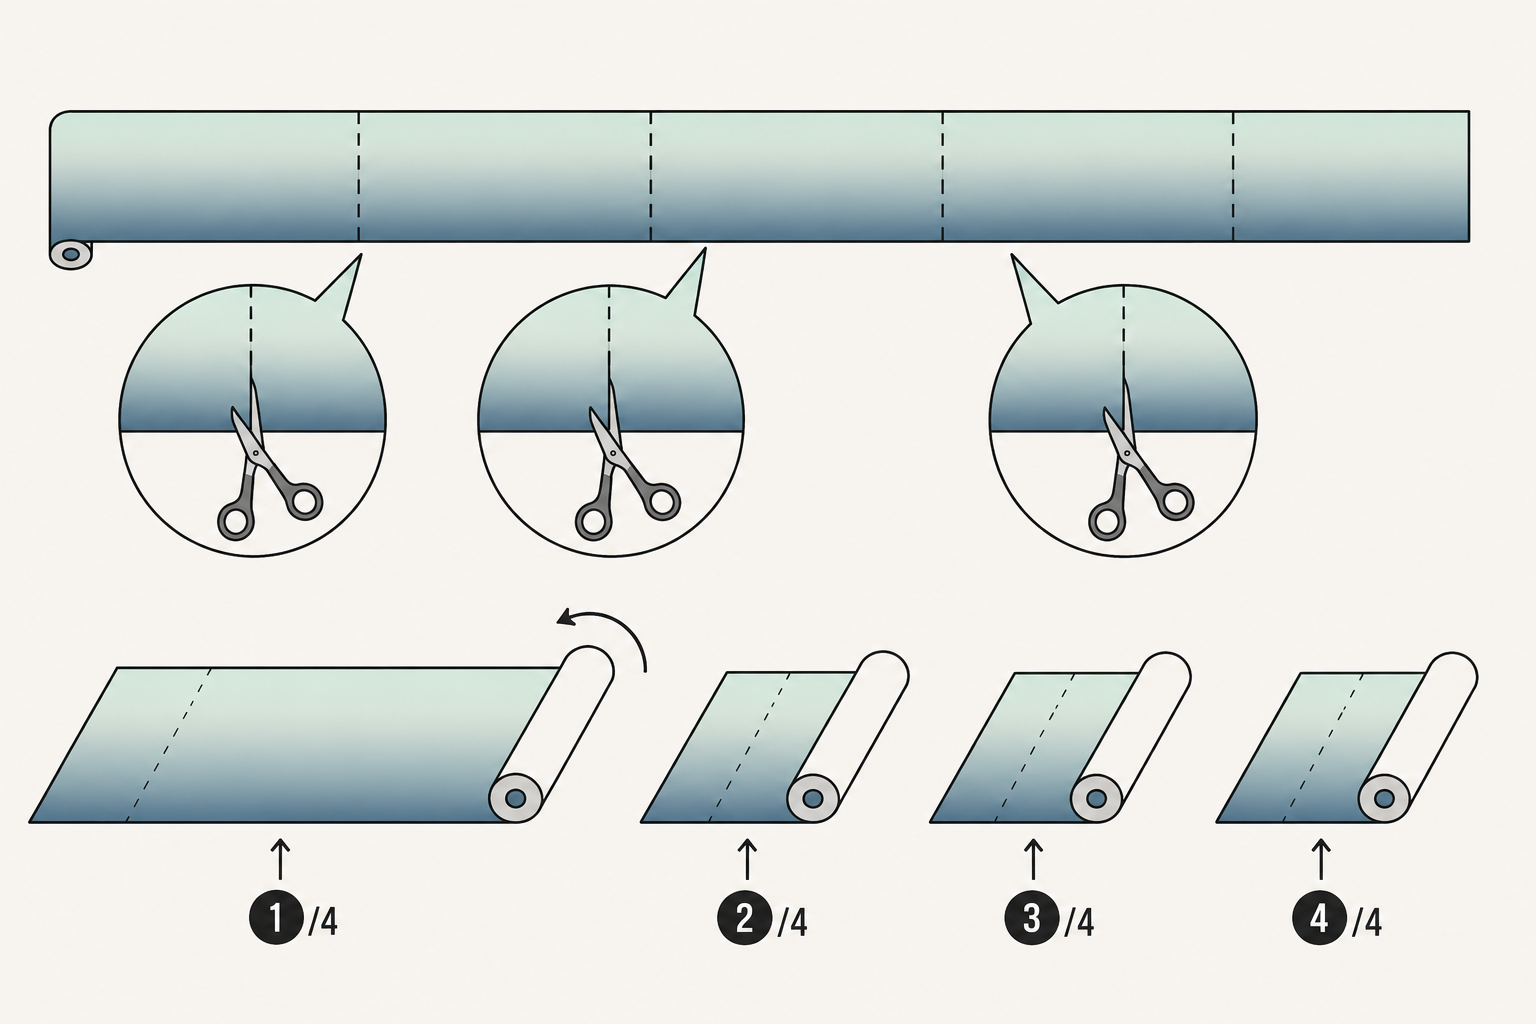
Before opening the adhesive, inspect all wallpaper rolls or panels.
Check that:
- The design matches your order.
- All rolls are free from damage.
- You have the correct number of panels.
- The wallpaper pattern lines up correctly.
If you are installing a custom mural, arrange the panels in numerical order before beginning.
2. Mark a Vertical Guide Line
Wall murals should normally be installed from left to right.
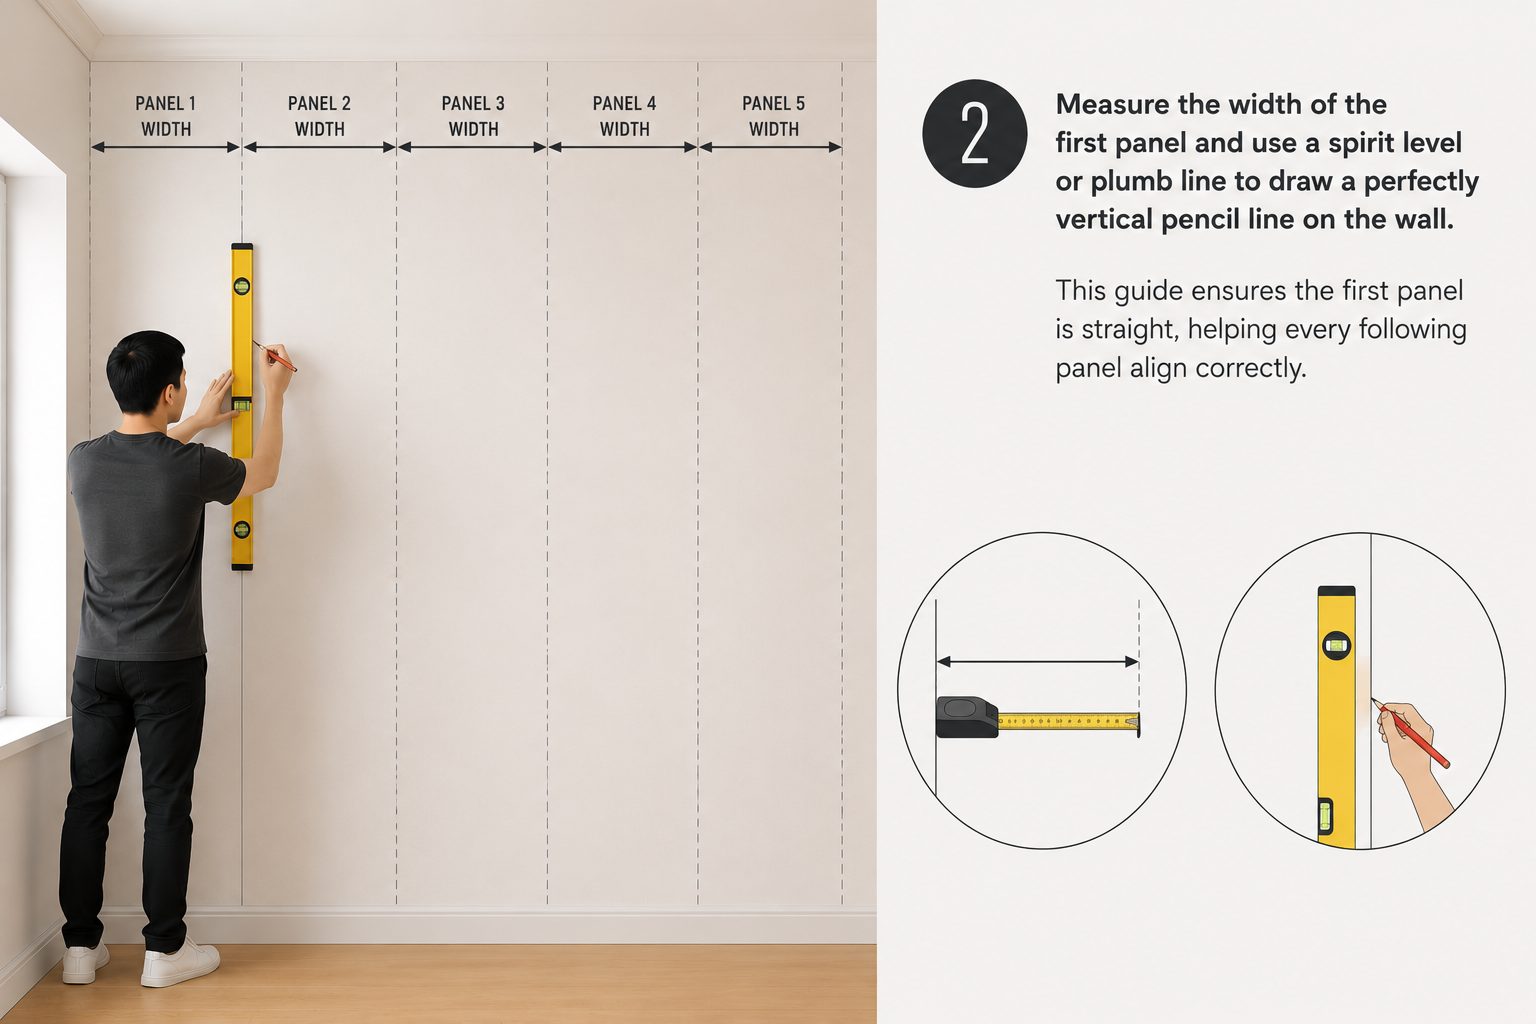
The first wallpaper strip determines how straight the entire installation will be.
Using a spirit level or plumb line, draw a vertical pencil line approximately one wallpaper width from your starting corner.
Even if the corner appears straight, always use a guide line, as walls are rarely perfectly square.
3. Apply Wallpaper Adhesive
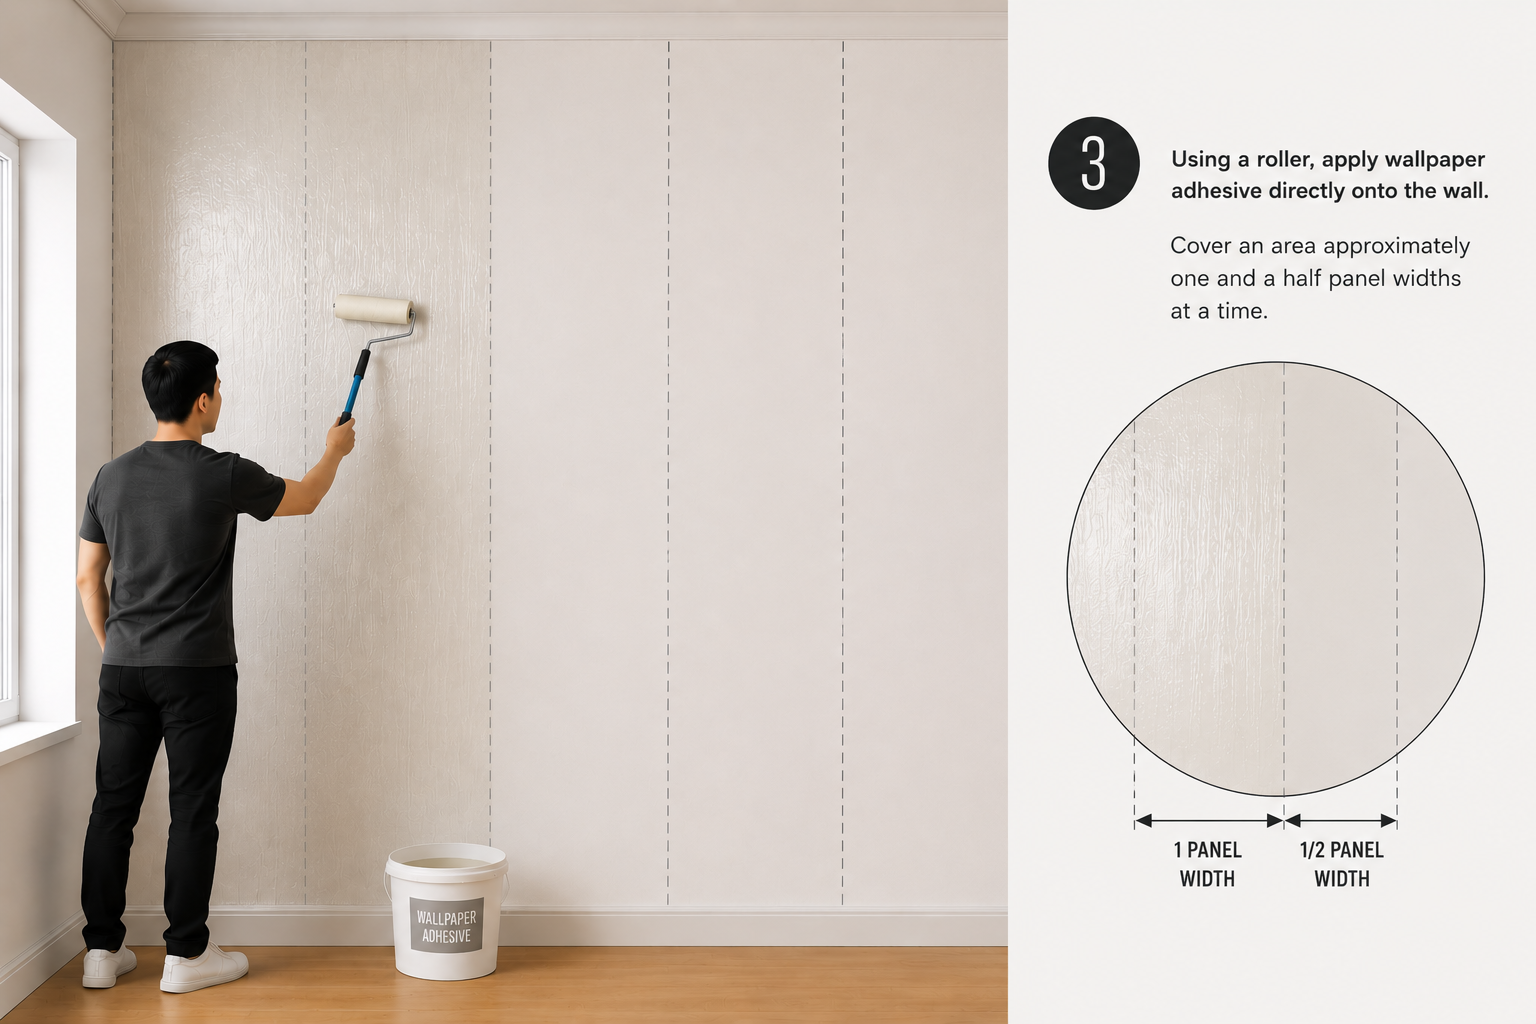
Unlike traditional wallpaper, non-woven wallpaper is installed using the paste-the-wall method.
Apply wallpaper adhesive evenly using a paint roller, covering approximately one and a half strip widths at a time.
Use a paintbrush to apply adhesive along:
- The ceiling
- Corners
- Around windows and doors
- Skirting boards
Ensure the entire surface is evenly coated to prevent bubbles or lifting.
4. Hang the First Panel
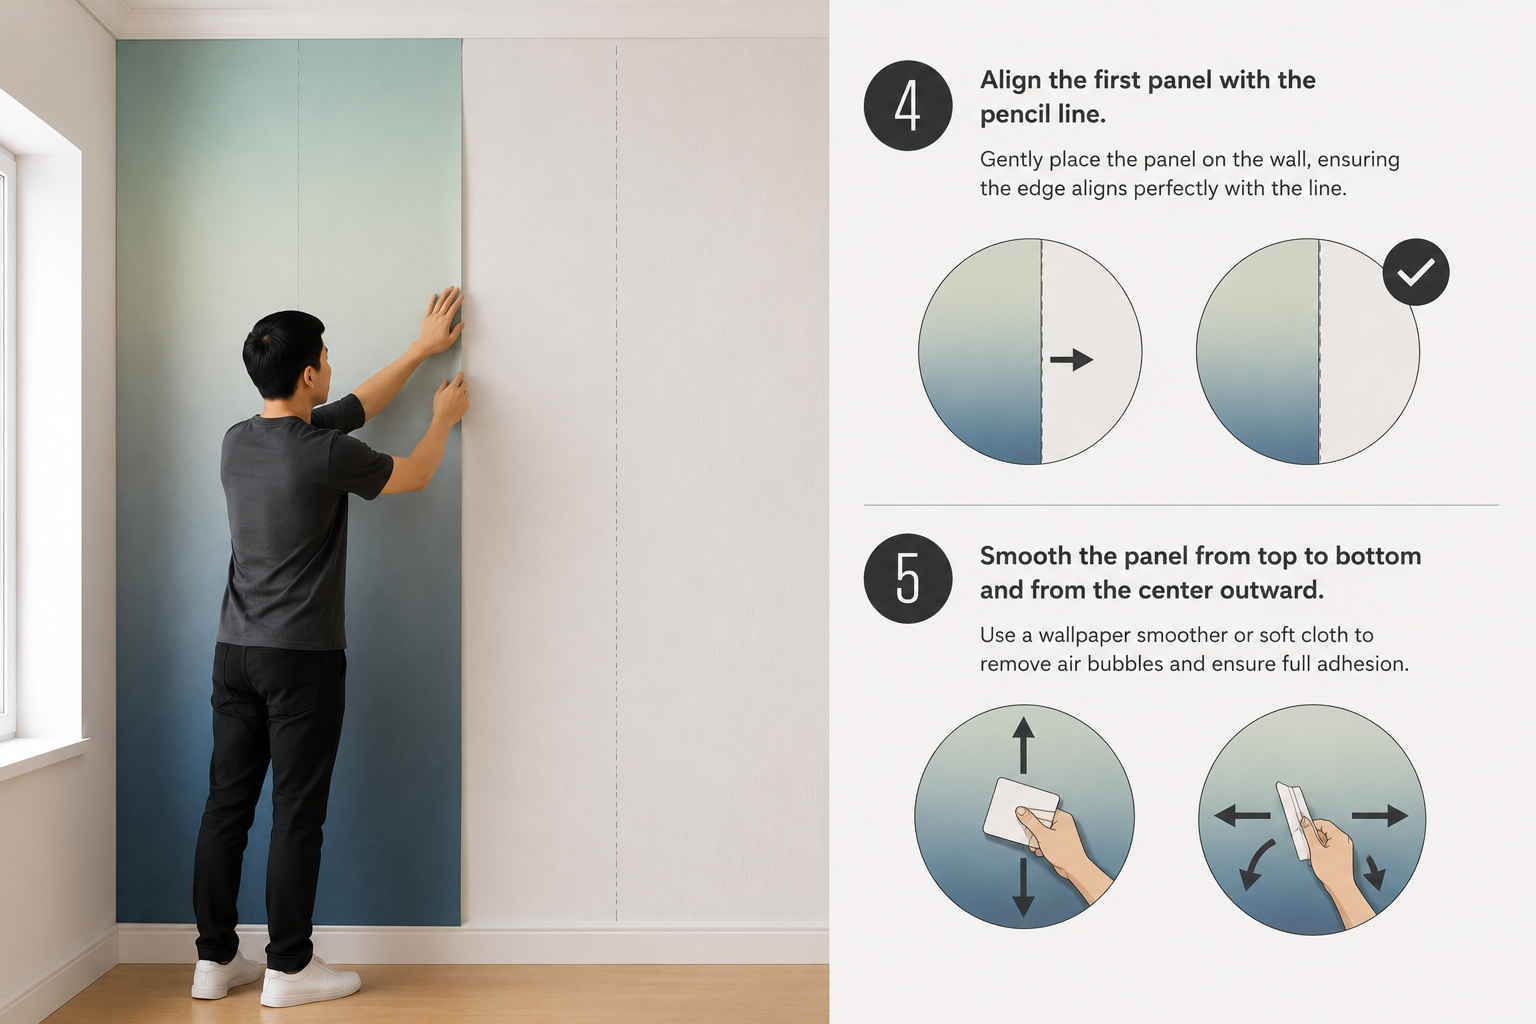
Starting in the left-hand corner of the wall, align the first wallpaper strip with your guide line.
Smooth the wallpaper gently onto the wall using a wallpaper brush or smoothing tool.
Work:
- From the centre outwards.
- From the top down.
Avoid stretching the wallpaper while smoothing.
Take your time with the first panel, as it determines the alignment of the entire mural.
5. Hang the Remaining Panels
Hang each wallpaper strip edge to edge without overlapping.
Carefully match the pattern before smoothing each strip into place.
Continue applying wallpaper adhesive only to the section of wall you are working on.
Check each seam as you progress to ensure it remains tight and nearly invisible.
6. Remove Excess Adhesive
While installing each panel, wipe away any excess wallpaper adhesive immediately using a clean, damp sponge.
Avoid allowing adhesive to dry on the printed surface.
Use gentle pressure when cleaning to avoid damaging the mural.
7. Trim the Edges
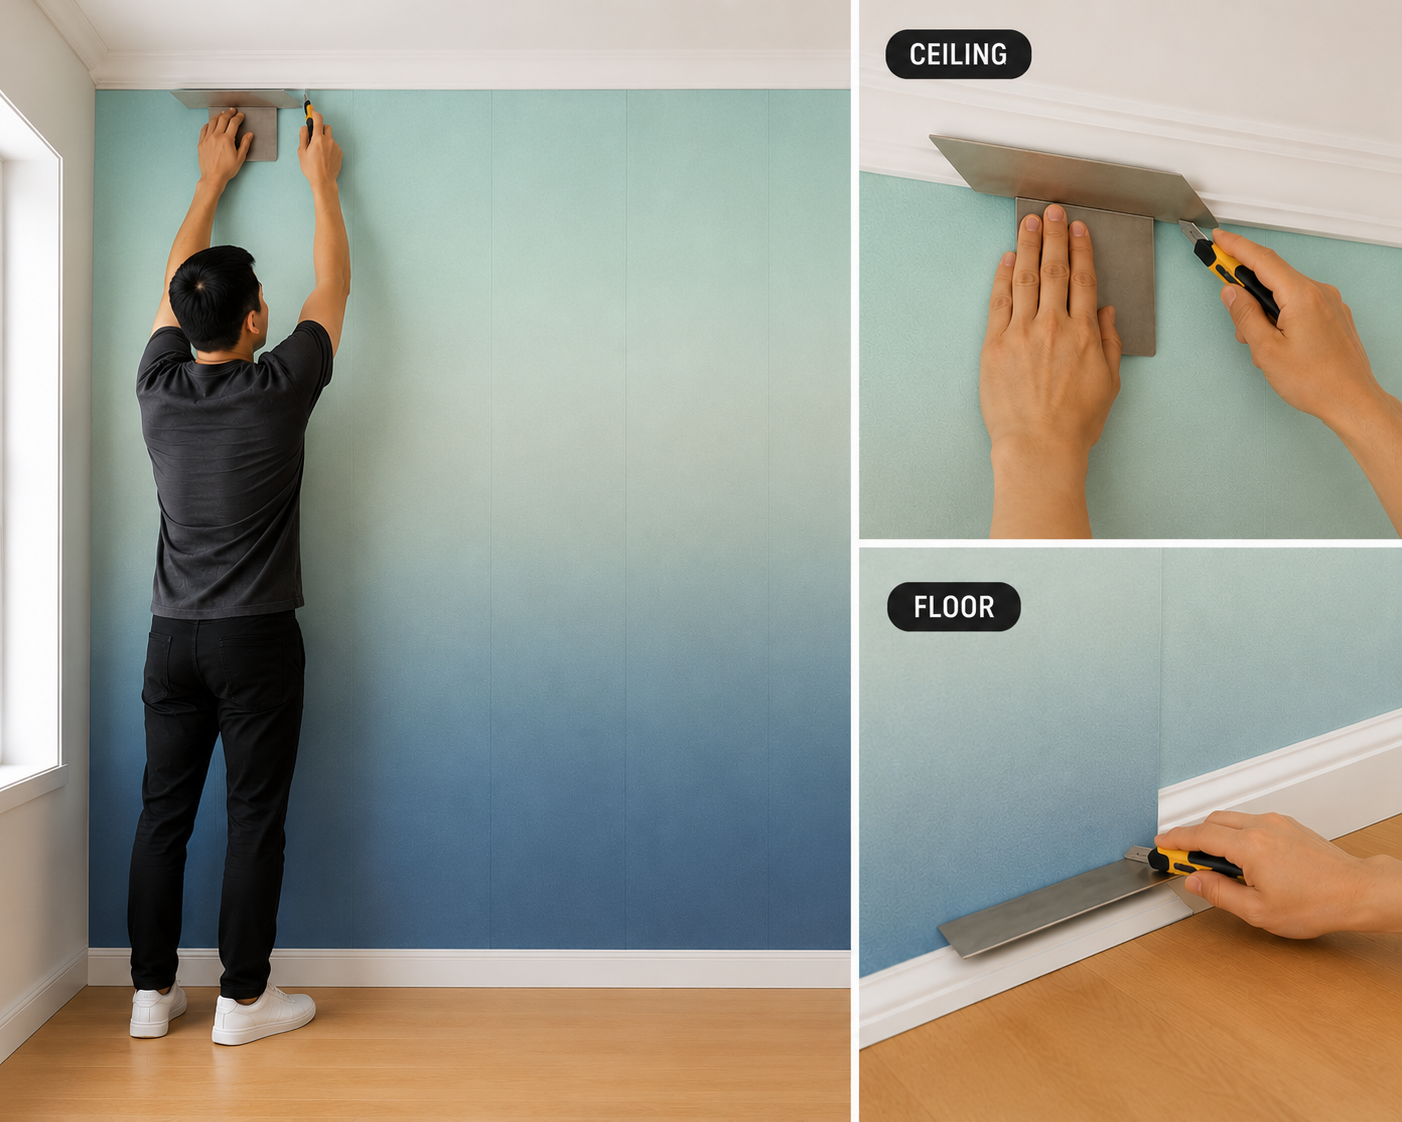
Once all panels have been installed, trim the excess wallpaper along the:
- Ceiling
- Floor
- Corners
Use a sharp knife together with a metal straight edge for clean, accurate cuts.
Replace the blade regularly to avoid tearing the wallpaper.
8. Allow the Wallpaper to Dry
Once installation is complete, leave the wallpaper to dry naturally.
Keep the room:
- Well ventilated
- At a normal indoor temperature
- Free from excessive heat or strong draughts
Allow approximately 24 hours for the wallpaper adhesive to dry fully.
Practical Tips for Better Results
For the best wallpaper installation:
- Always use a plumb line for the first strip.
- Apply wallpaper adhesive evenly across the wall.
- Change knife blades regularly.
- Match the wallpaper pattern before smoothing each strip.
- Wipe away excess adhesive immediately.
- Work methodically across the wall rather than rushing.
Most installation problems begin with poor preparation or an uneven first strip.
Common Mistakes to Avoid
Avoid these common wallpapering mistakes:
- Hanging the first strip without using a plumb line.
- Applying too little wallpaper adhesive.
- Leaving dry patches on the wall.
- Stretching the wallpaper during installation.
- Allowing wallpaper adhesive to dry on the wallpaper surface.
- Using a blunt knife for trimming.
- Hanging wallpaper on an unprepared wall.
Taking extra care with the first strip usually makes the rest of the installation much easier.
When to Call a Professional
Installing wallpaper is a manageable DIY project for many homeowners.
Professional installation may be worth considering if:
- The room has very high ceilings.
- The wallpaper has a complex repeating pattern.
- The walls are severely uneven.
A professional installer can minimise waste and ensure perfect pattern alignment.
FAQ
Do I apply wallpaper adhesive to the wallpaper or the wall?
For non-woven wallpaper, apply the wallpaper adhesive directly to the wall. This is known as the paste-the-wall method and makes installation cleaner and easier.
Where should I start hanging wallpaper?
Start in the left-hand corner of the wall and work towards the right. If hanging from right to left, begin with the last numbered panel.
Should wallpaper overlap?
No. Non-woven wallpaper should be hung edge to edge without overlapping to create nearly invisible seams.
How long does wallpaper adhesive take to dry?
Most wallpaper adhesives require around 24 hours to dry completely, depending on room temperature and humidity.
Can I install wallpaper by myself?
Yes. Many homeowners can successfully install wallpaper themselves. However, having a second person can make handling long wallpaper strips much easier, particularly for feature walls or ceilings.
Conclusion
Installing wallpaper is a rewarding DIY project that can completely transform a room. By preparing the wall properly, using the correct wallpaper adhesive and carefully aligning the first strip, you can achieve a smooth, professional-looking finish with minimal waste.
Taking your time during preparation and installation helps premium and made-to-measure wallpaper sit smoothly, maintain accurate pattern alignment and provide a beautiful finish for years to come.


